SpinRite is a fantastic tool for repairing and maintaining hard drives, and I am proud to say that its purchase price has been more than recouped on drives that it has brought back into service that would otherwise have needed replacing!
Running it on an Intel Mac hasn’t been possible with version 6.0. It actually boots fine, but there is no way to give keyboard input, and thus there is no way to kick off a scan.
Reports that people had succeeded at getting SpinRite to work on various weird and wonderful platforms indirectly, using VirtualBox and its raw disk access mode, led me to experiment with this to run SpinRite on a Mac. This is particularly useful on iMacs where pulling the hard drive out of the case is… undesirable(!)
Performing the wrong operations when you have raw access to the disk, a technique this process uses, can cause you to lose data. You must have a backup.
Obviously, I do not accept any responsibility and cannot help if you break things by using these notes. Hard hats must be worn beyond this point. All contractors must report to the site office.
Boot from another disk
You’ll need a working MacOS install on another disk that you can boot from, as we need to unmount all the volumes on the disk to be scanned in order to gain raw access to the disk. I use SuperDuper to make bootable backups, and these work great for this purpose too.
Prepare the Environment
Make sure you have VirtualBox installed, with the optional Command Line Tools.
Turn off screen savers, sleep timers and screen lock, just in case the VM has taken keyboard input away from you and you are unable to unlock the Mac to check on SpinRite’s progress. It’s certainly not an ideal situation to have to pull the plug on the computer while that VM has raw access to your target disk!
Identify the Target Disk
It is critical that you identify the BSD device name for the whole disk that you want to operate on. In my case, I’d booted from disk1 and the SpinRite target disk was disk0.
Determine the correct disk identifiers with:
diskutil list
Create a Raw Disk Access VMDK
When you are sure you have the right disk identifier, we need to create a sort of dummy disk image that redirects input and output to the raw disk. Assuming you didn’t elect to remove the VirtualBox Command Line Tools when you installed VirtualBox, run:
sudo /usr/local/bin/VBoxManage internalcommands createrawvmdk -filename raw.vmdk -rawdisk /dev/disk0
Substitute in the disk identifier of your target disk.
Launch VirtualBox as Root
In order to read and write to a raw block device, we (sensibly) need rather elevated permissions. Normally running VirtualBox as root is crazy, but we do have a specific justified use case here!
You can’t launch it using the UI, or interactively log in as root on MacOS, so we’ll do this from the command line:
sudo /Applications/VirtualBox.app/Contents/MacOS/VirtualBox
(Note that you must invoke the executable directly, and not use something like open, or you won’t get root permissions.)
Prepare a SpinRite VM
You’ll need your SpinRite.iso file that you’ve generated by running the application from inside Windows, or through Wine/Crossover.
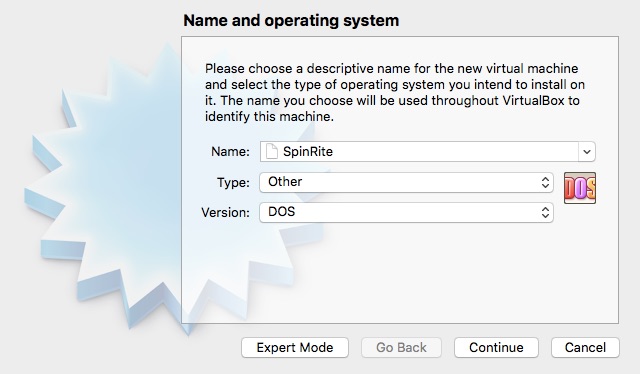
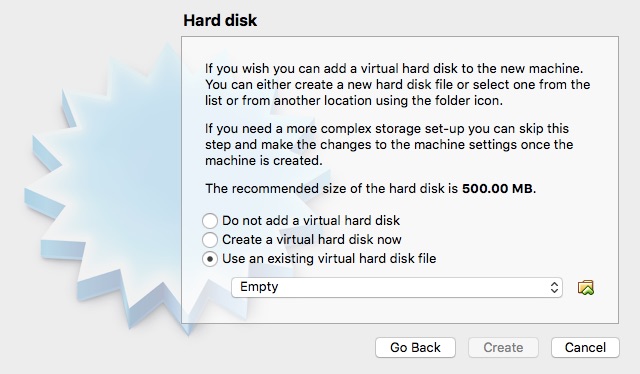
In our scarily privileged VirtualBox, create a new VM. The type will be DOS. Choose the vmdk image file we created earlier.
Make sure you then also add a CD-ROM drive and point that at your SpinRite ISO. That will obviously be the volume from which the VM boots.
Ensure the Target Disk is Unmounted
On the host MacOS system, verify that there are no mounted volumes starting with disk0 (or your target disk identifier) when you run:
mount
If any are mounted, you’ll see one or more identifiers, one for each partition on that physical disk that is mounted. If you see any, unmount each of them in turn, like so:
diskutil unmount disk0s2
Start the VM
If all goes well, you can start the VM and you won’t receive an error about a device being in use. If you see that error, double-check that no volumes from the target disk have been automatically re-mounted by MacOS. Once the VM holds the lock on the target disk block device, MacOS will no longer be able to mount any volumes, so that (in this case) annoying automount behaviour will stop being a problem for us!
It is worth checking that after SpinRite identifies available devices, that you see “GPT followed by MBR” as the partition type. If not, you might have done something wrong (such as used a partition identifier like disk0s2 as the raw device instead of the whole disk). Don’t proceed if you are in doubt!
Then, let SpinRite work its magic on your Mac disk, without having to pull it out of the middle of that beautiful iMac enclosure!


So does this work with my GPT drives or not? My drives are all over 2TB. I don’t working in 2010 anymore. I’ve been waiting for Spinrite 6.1 for three years. Hopefully we will get it soon. I’m not doubting that Spinrite works for older drives (or virtual small ones), but I will stick with Disk Warrior until modern drives are supported. It has never let me down.