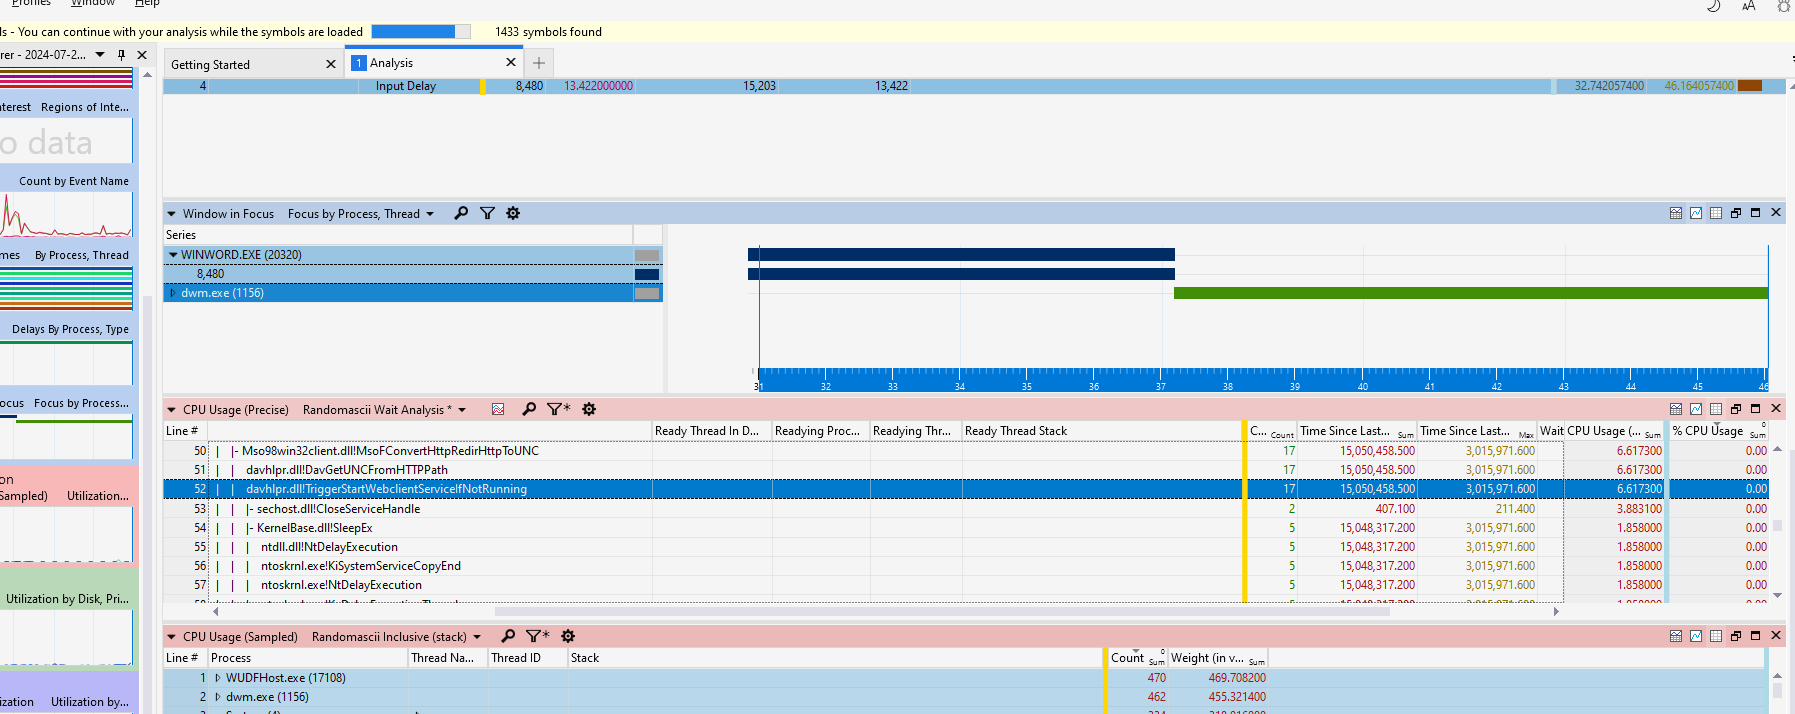
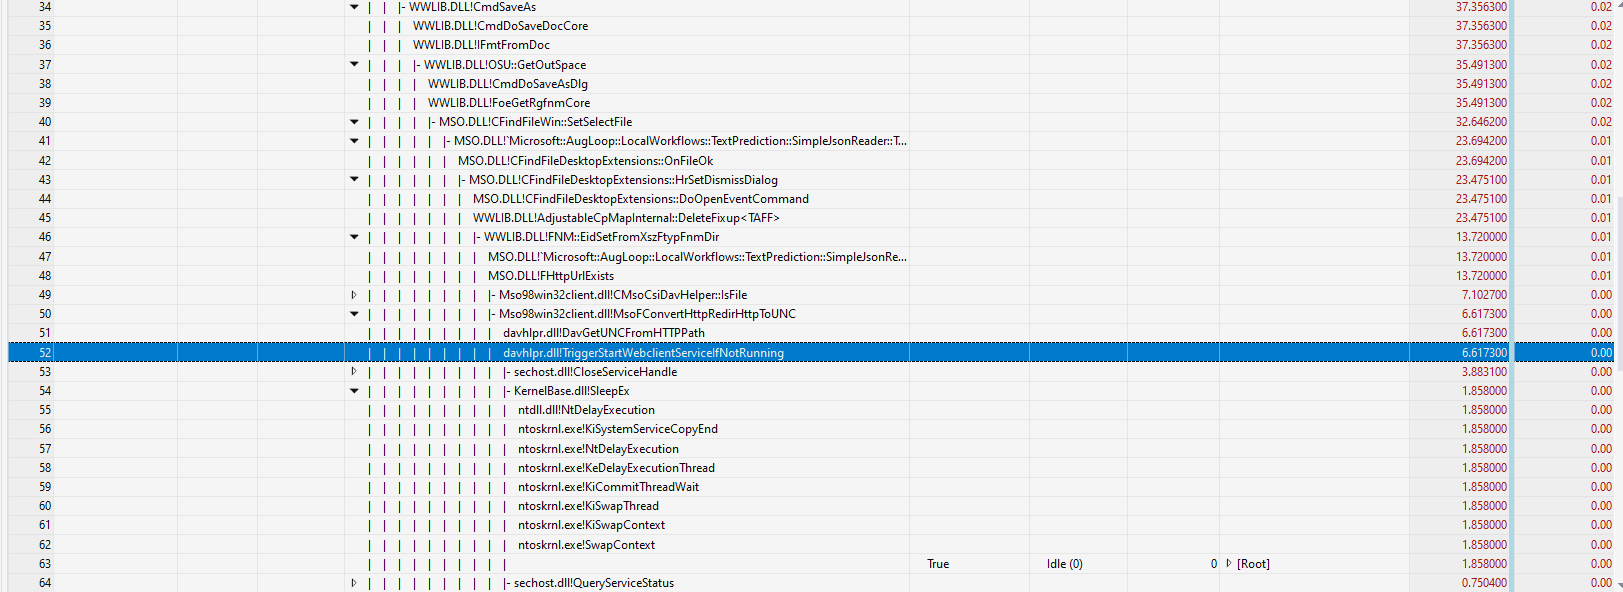
Drilling down to the problem time area and then digging into the amount of time we spend in each function revealed that the time was being spent in davhlpr.dll!TriggerStartWebclientServiceIfNotRunning.
Well this does indeed sound like something to do with the Web Client service!
The Zabbix Agent 2 on Linux uses a non-root account by default (“zabbix”), and thus provides some protection against the worst outcomes of a potential vulnerability in the agent, or perhaps a takeover of a Zabbix server that monitors that agent.
The Agent on Windows, however, runs with NT AUTHORITY\SYSTEM, which has extensive privileges on the monitored system.
I have put together a little wrapper script around the Zabbix Agent 2 MSI installer which runs the installer, then reconfigures it to run as NT AUTHORITY\LocalService, which is a minimally privileged account.
You can find the script on GitHub. You’ll need to also grab the Zabbix Agent 2 MSI installer, rename it to zabbix-agent2.msi and provide that MSI in the same directory when you deploy.
It goes without saying that this is not officially supported, but I have not experienced any issues monitoring the standard items that are in the Windows by Zabbix Agent template. It is possible you will run into issues with unsupported items if the item in question does in fact require elevated permissions on the monitored host!
Hopefully this will be useful to others looking to monitor Windows systems with Zabbix, while maintaining as much of the principle of least privilege as possible!
I was delighted to have a recent opportunity to practise my own skills in this area, following Bruce’s lead!
The Symptom
The end user was experiencing delays of between several seconds and about half a minute when saving comments in a Word document. Choosing to Insert the comment was fine and when typing the comment, Word also behaved normally. Press Save, however, and Word’s UI would hang for somewhere between a few and 30 seconds.
Yep, sometimes half a minute for each comment being saved!
In a document that required a lot of comments, this was dramatically slowing the user’s work.
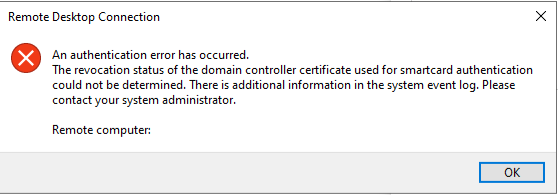
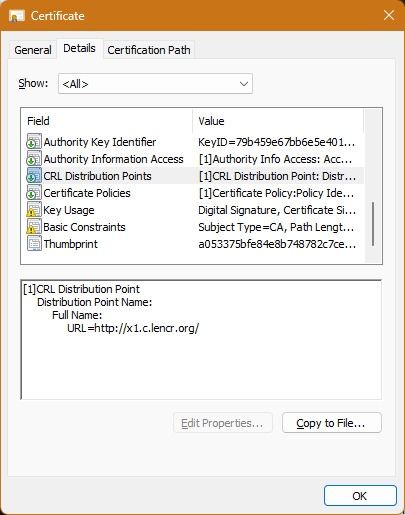
The revocation status of the domain controller certificate used for smartcard authentication could not be determined. There is additional information in the system event log. Please contact your system administrator.
If you have smartcard authentication set up for logging into certain Active Directory systems, and also a restrictive web proxy on the machine acting as the RDP client, you may run into this issue.
My mistake was checking that the RDP server had access to the CRL mentioned in the certificate.
Yes, the RDP server might be quite happy in terms of checking the certificate revocation, but if the RDP client can’t access the CRL URL (perhaps through the configured proxy), you will receive this same error.
Check connectivity to the stated CRL distribution point from the RDP client and RDP server!
I am intrigued by Trail of Bits’ new tool RPC Investigator. Exploring Windows internals is of ongoing interest, and this seems like a very interesting tool to shed light on some of that internal complexity and learn more about how the OS works.
Trail of Bits is releasing a new tool for exploring RPC clients and servers on Windows. RPC Investigator is a .NET application that builds on the NtApiDotNet platform for enumerating, decompiling/parsing and communicating with arbitrary RPC servers. We’ve added visualization and additional features that offer a new way to explore RPC.
RPC is an important communication mechanism in Windows, not only because of the flexibility and convenience it provides software developers but also because of the renowned attack surface its implementers afford to exploit developers. While there has been extensive research published related to RPC servers, interfaces, and protocols, we feel there’s always room for additional tooling to make it easier for security practitioners to explore and understand this prolific communication technology.
I could not find a binary release of the code on GitHub, just instructions on how to build it yourself.
I have done nothing to the original repo’s code except open and build in Visual Studio 2022. I am sharing this binary build in case others want to avoid having to build the code themselves.
Binary releases here may be kept up-to-date, or may not. It is on a best effort basis. 🙂
In a continuation of my desire to write really lightweight software that doesn’t add to the undesirable background bloat running on computers, I set about in June-ish to write something to improve upon a VBScript-Scheduled-Task-and-shutdown.exe gaffer tape of a solution to forcing a full shutdown when a computer is idle that I had previously cobbled together.
Power management in Windows is mature and capable, for sure, but what is less obvious is how to, on shared fixed desktop computers, actually trigger a proper shutdown and not just put idle machines to sleep. Hibernation is an option, of course, but the relentless increase in complexity of Windows brings to mind the other, stability-related, benefits of regular proper restarts.
So, then, we want something that:
identifies when no-one is interactively signed in
waits a configurable amount of time
if still no-one has signed in in that time, shut down properly
Additionally, because this unavoidably must run with high permissions and regularly assess signed in users in the background, it should be a Windows service that is as lightweight and simple as possible. Reduced resource usage (RAM, CPU time in background) so we can shut down and have reduced resource usage (of electrical power). I can see the beauty of it already!
EvaluationIntervalSeconds — DWORD. How frequently, in seconds, to evaluate for interactive sessions.
ShutdownAfterIdleForSeconds — DWORD. How many seconds of idle computer (i.e. no interactive sessions) before issuing a shutdown. This is periodically evaluated as above.
Like all my lightweight, C(++) Win32 projects, it is officially experimental as I am using these projects to learn how to write this kind of code properly. Any suggestions and improvements are gratefully received.
Despite the inexorable march towards running all workloads in the cloud, I see some specific advantages in maintaining some on-premises servers where this makes sense. Especially in a small scale environment like the one I am responsible for, this lets me do Interesting Things with my skill set and at small scale, only because I have full control over on-prem kit.
One of the options for backing up Hyper-V workloads I am looking at is Microsoft Azure Backup Server (MABS) v3. On a brand new deployment (Windows Server 2019), following Microsoft’s guide, I ran into issues with the MABS installer.
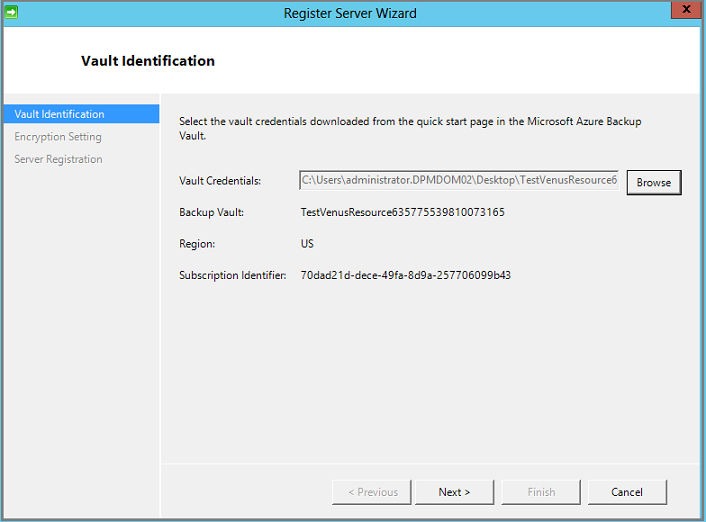
At the point of connecting to the Vault above, it would take a long time to “validate credentials” and then:
Invalid vault credentials provided. The file is either corrupt or does not have the latest credentials associated with recovery service. ID 34513
I found a way to work around this — we need to slipstream an updated version of the Microsoft Azure Recovery Service (MARS) Agent into the MABS installer before we run it.
Tidy Up First
If you have a messy server after some failed install attempts, roll back the VM if possible, or uninstall all MABS and MARS components with Add/Remove Programs.
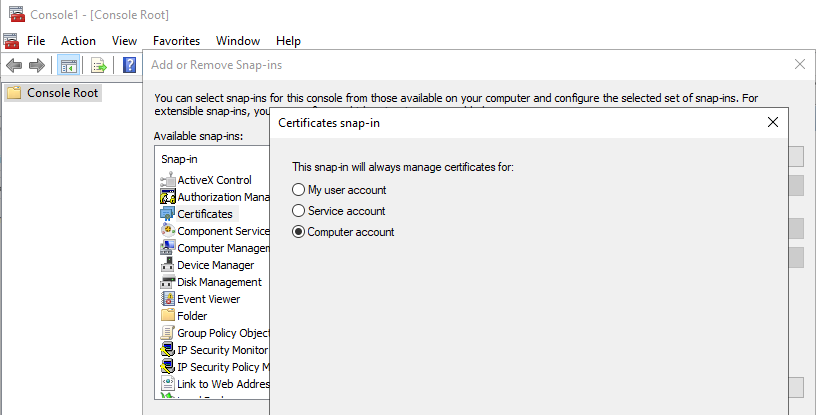
Also, use the MMC certificates snap-in in Local Computer mode to remove any stale vault credential certificates.
To do, this launch mmc.
We will Add/Remove Snap-ins, and choose Certificates, Local Computer.
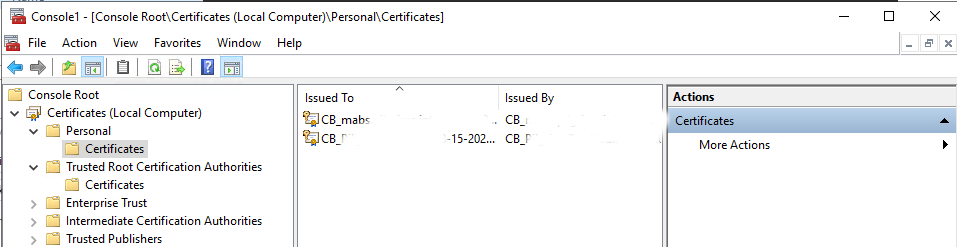
Remove any CB_ certificates from previous runs to avoid any possibility of confusion when the registration process runs again.
Take care to ensure you understand what you are doing before deleting certificates and keys. Do not delete anything you are not certain is unused and related to MABS. I cannot take responsibility for your loss if you follow this guide and have issues.
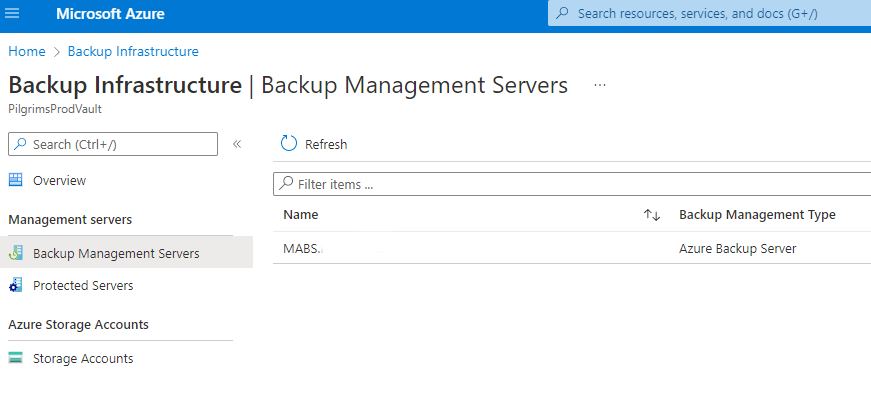
In the Azure Portal, go to your backup vault and check Backup Management Servers and Protected Servers, removing any registrations from previous failed installs, so we are installing into the vault with a clean state. Alternatively, create a new vault. I unfortunately ended up with my MABS server in Protected Servers and had to delete it. Ultimately it will be registered as a Backup Management Server, not a Protected Server.
The Workaround — Slipstream Updated MARS into MABS Installer
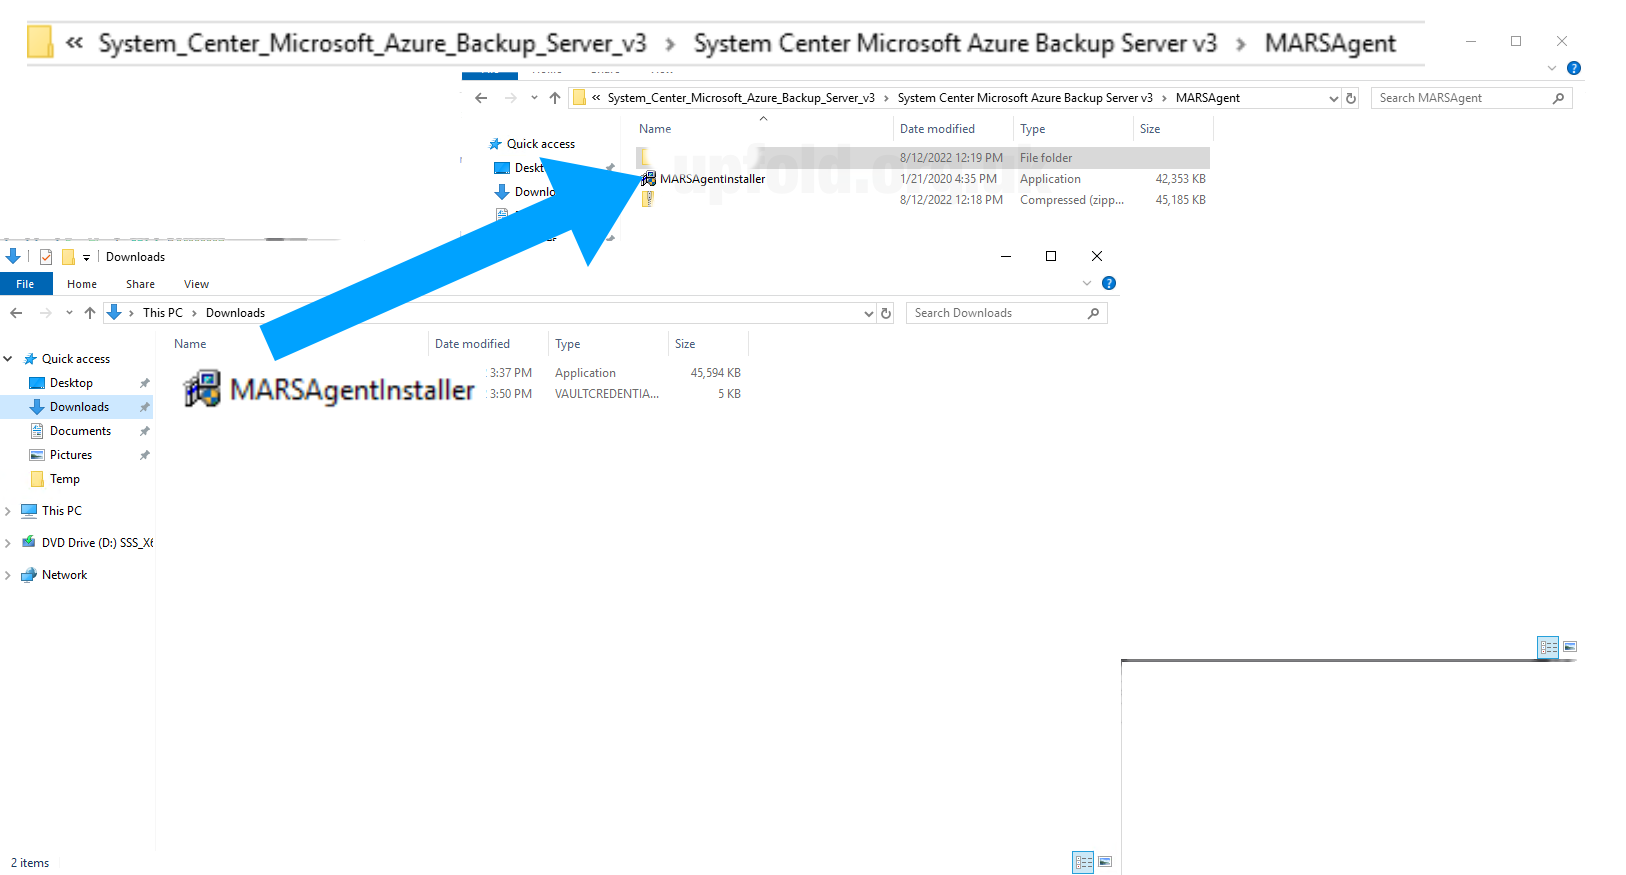
We will have the .exe and 7 .bin files. Run the .exe to extract the bin files. The install “media” in this case has now been extracted to C:\System_Center_Microsoft_Azure_Backup_Server_v3\System Center Microsoft Azure Backup Server v3.
Before we run the MABS setup wizard, we need to slipstream in the updated MARSAgentInstaller. Do not run the MARSAgentInstaller separately – we must have it invoked by the MABS wizard at the right time and in the correct context. If MARS is already installed when we try to install MABS, it will be unhappy and refuse.
Copy and replace the version in C:\System_Center_Microsoft_Azure_Backup_Server_v3\System Center Microsoft Azure Backup Server v3\MARSAgent\MARSAgentInstaller.exe before running either setup program.
Now run C:\System_Center_Microsoft_Azure_Backup_Server_v3\System Center Microsoft Azure Backup Server v3\Setup.exe (the MABS installer, not the MARSAgent installer) and proceed as normal.
Provide the vault credentials we downloaded from the Azure portal to register the server as normal.
References
This references issue raised on TechNet forums. I cannot reply as the thread is locked.
With a relatively recent Azure AD hybrid directory under our belts, we decided at work not to use the older Azure AD Connect tool and instead use the newer Azure AD Connect Cloud Sync. It’s lighter weight, doesn’t require a SQL database — lots of reasons to love it.
It does appear that, juuuust in time for our deployment, password writeback is supported, in preview.
However, I struggled to follow the official instructions to enable it, as the cmdlet did not seem to be available after importing the DLL.
Set-AADCloudSyncPasswordWritebackConfiguration : The term 'Set-AADCloudSyncPasswordWritebackConfiguration' is not
recognized as the name of a cmdlet, function, script file, or operable program. Check the spelling of the name, or if
a path was included, verify that the path is correct and try again.
At line:1 char:1
+ Set-AADCloudSyncPasswordWritebackConfiguration
+ ~~~~~~~~~~~~~~~~~~~~~~~~~~~~~~~~~~~~~~~~~~~~~~
    + CategoryInfo          : ObjectNotFound: (Set-AADCloudSyn...ckConfiguration:String) [], CommandNotFoundException
    + FullyQualifiedErrorId : CommandNotFoundException
A little bit of investigating revealed that the DLL does indeed export the cmdlet, so what is going on?
I tried to run the above in PowerShell 7. It imported the cmdlet, but hit an issue with running it when importing its required libraries.
My Workaround
My workaround is to use PowerShell 7, but import the module with the -UseWindowsPowershell compatibility switch.
I’m delighted to announce DfontSplitter 0.4 for Windows. After a nine-year hiatus without software updates, this release has big under-the-bonnet changes!
The application is now built with .NET 4.7.2 and runs on Windows 7 – Windows 10. If you still need support going back as far as Windows 98(!), you can still use the old version.
A new, improved, fondu (which does the bulk of the work) is bundled as a DLL that is Windows-native and no longer requires the Cygwin library. It also includes a number of memory safety improvements.
To fix the long-standing issue where extracted TTFs didn’t quite play nicely with Windows, DfontSplitter 0.4 for Windows embeds functionality from FontForge to do some final conversion work to make your fonts work perfectly with Windows.
The “T with chisel” DfontSplitter icon is licensed under the GNU Free Documentation License, Version 1.2 or any later version published by the Free Software Foundation; with no Invariant Sections, no Front-Cover Texts, and no Back-Cover Texts. The icon includes a modified version of “Chisel wood 24mm” by Isabelle Grosjean, which is also licensed as such.
Even despite the dominance of webmail, I have long used a traditional desktop email client. I like having a local mail archive should “the cloud” have trouble, as well as the ability to exert control over the user interface and user experience. (That might be partly a euphemism for not having to see ads!)
Apple’s Mail.app built into macOS (going to have to get used to not calling it OS X!) has served me pretty well for quite some time now, alongside Thunderbird when I’m on Linux, and while Mail.app offered the most smooth interface for the platform, it didn’t always have all the features I wanted.
For example, being able to run mail rules is more limited than I wanted in Mail.app. I could have rules run automatically as messages arrived in my inbox, or disable them entirely. But actually how I wanted to use rules was to be able to cast my eye over my inbox, and then bulk archive (to a specific folder) all emails of a certain type if I’d decided none needed my fuller attention.
Recently, I moved to Thunderbird on my Mac for managing email and discovered QuickArchiver.
As well as letting you writing rules yourself, QuickArchiver offers the clever feature of learning which emails go where, and then suggesting the right folder to which that message can be archived with a single click.
It’s still early days, but I am enjoying this. Without spending time writing rules, I’m managing email as before, and QuickArchiver is learning in the background what rules should be offered. The extra column I’ve added to my Inbox is now starting to populate with that one-click link to archive the message to the correct folder!
It’s just a nice little add-on if, like me, you (still??) like to operate in this way with your email.
There used to be advertising here, but I no longer feel sure that advertising delivers the best experience and truly reflects the values of this site.
Keeping things running, however, is not without financial cost. If you would like to support the time and effort I have put into my tutorials and writing, please
consider making a donation.


